Fonts
All themes in Hyvor Blogs comes with a default font. You can easily change it to any font you want. There are two ways to change the font.
1. Bunny Fonts (Built-in)
Hyvor Blogs has built-in support for Bunny Fonts. All fonts are loaded directly via your blog’s domain, preventing any privacy issues, third-party tracking, or additional DNS lookups.
https://[your-domain]/fonts/css/{family}- CSS Proxyhttps://[your-domain]/fonts/file/{file_name}- Font File Proxy
Step 1: Load Fonts
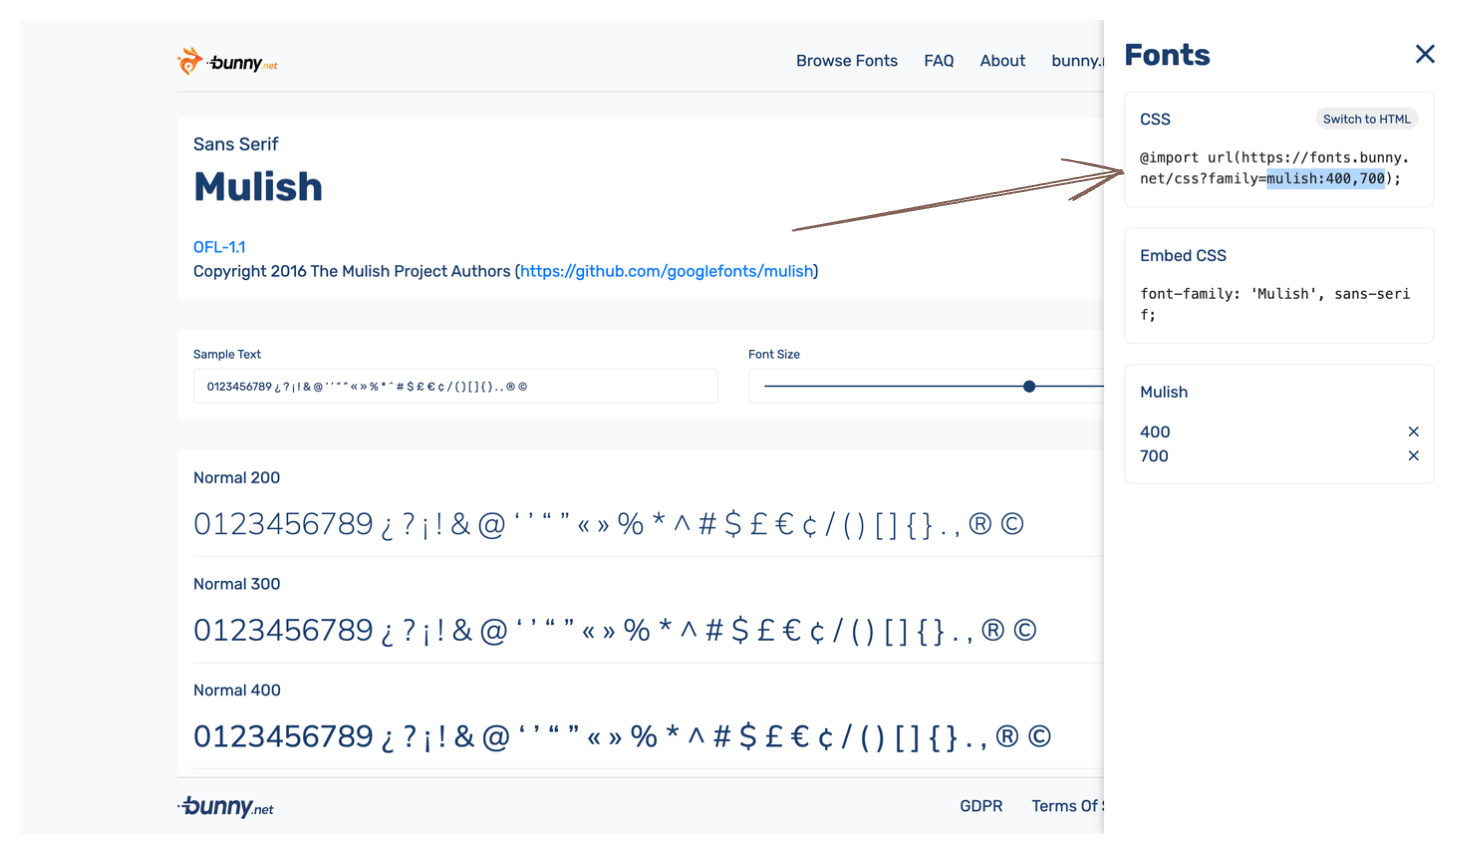
First, head over to Bunny Fonts and select the fonts and variants you like. You will see a CSS code to load the fonts as below.
@import url(https://fonts.bunny.net/css?family=mulish:400,700);From this, copy only the family part. In this case, it is mulish:400,700.
Then, paste it in Theme → config.yaml → THEME_FONTS in the Hyvor Blogs Console.
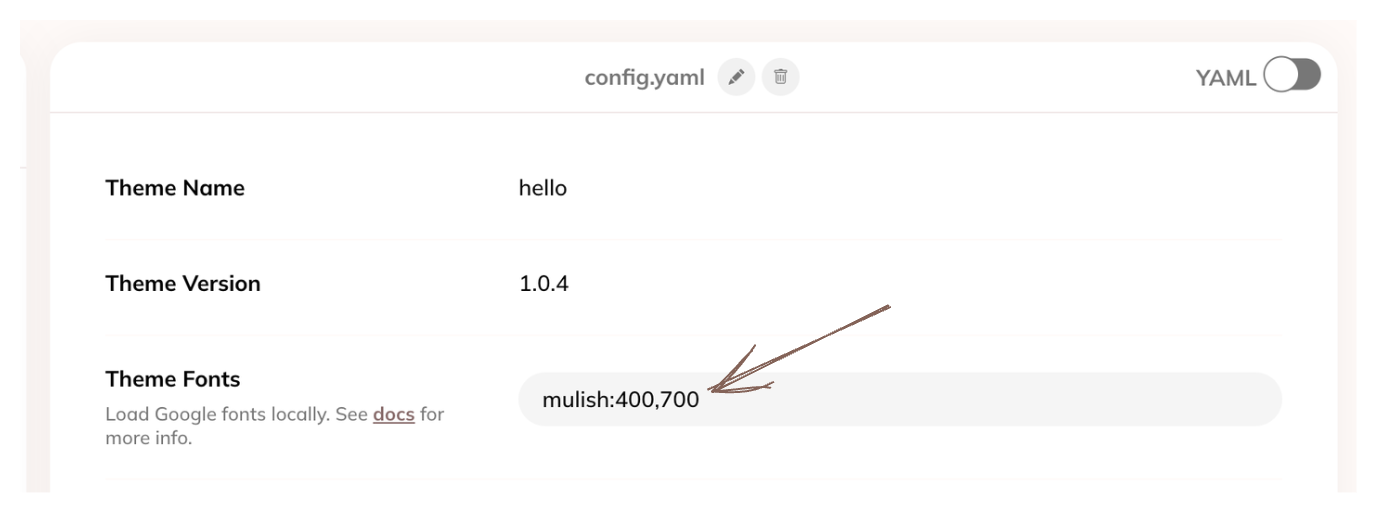
When you add this to the config.yaml, the fonts will be loaded in the <head> tag of your blog automatically. Then, you can use that font in your blog.
THEME_FONTS option after THEME_VERSION. THEME_NAME: hello
THEME_VERSION: 1.0.0
THEME_FONTS: "mulish:400,700"Step 2: Use Fonts
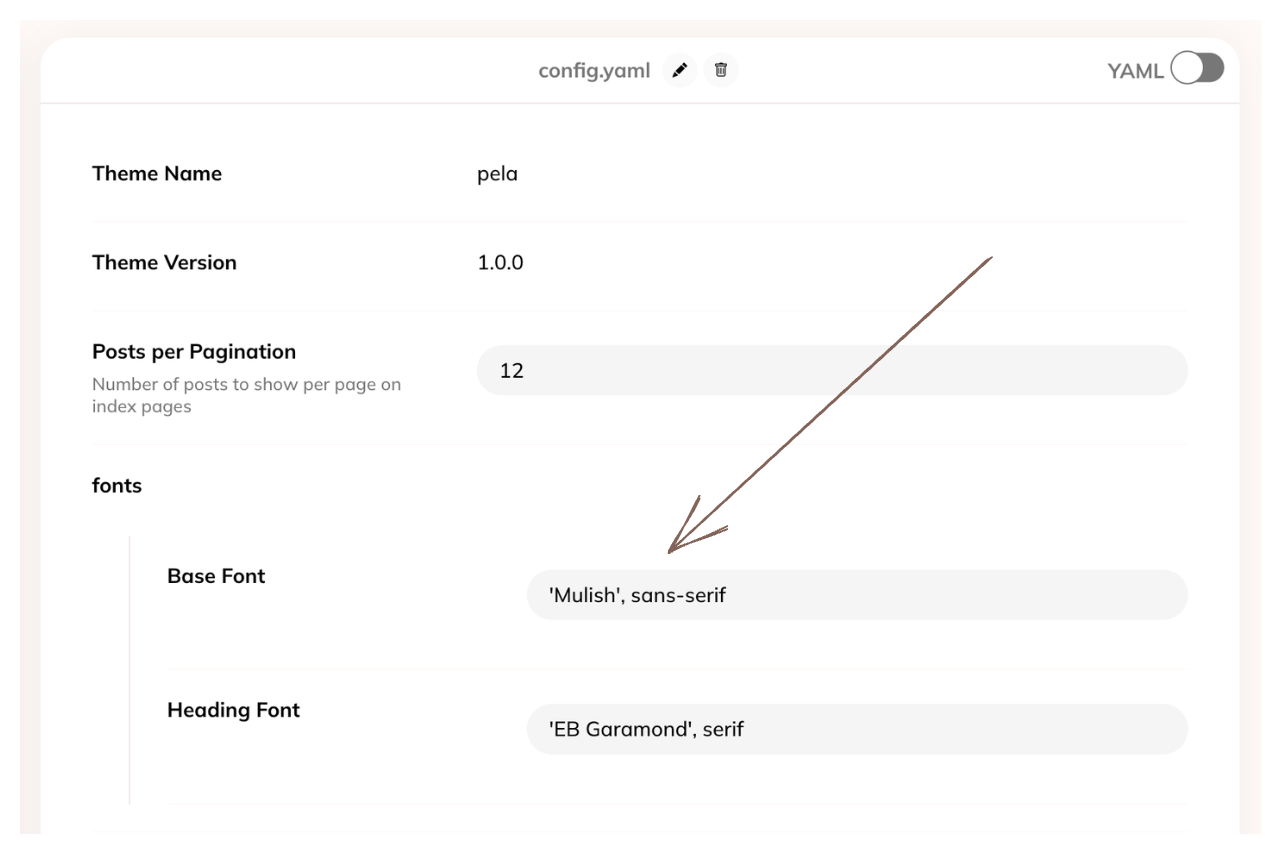
All official themes support font customization via config.yaml. Some themes have multiple font options for different parts of the blog (ex: text vs headings).
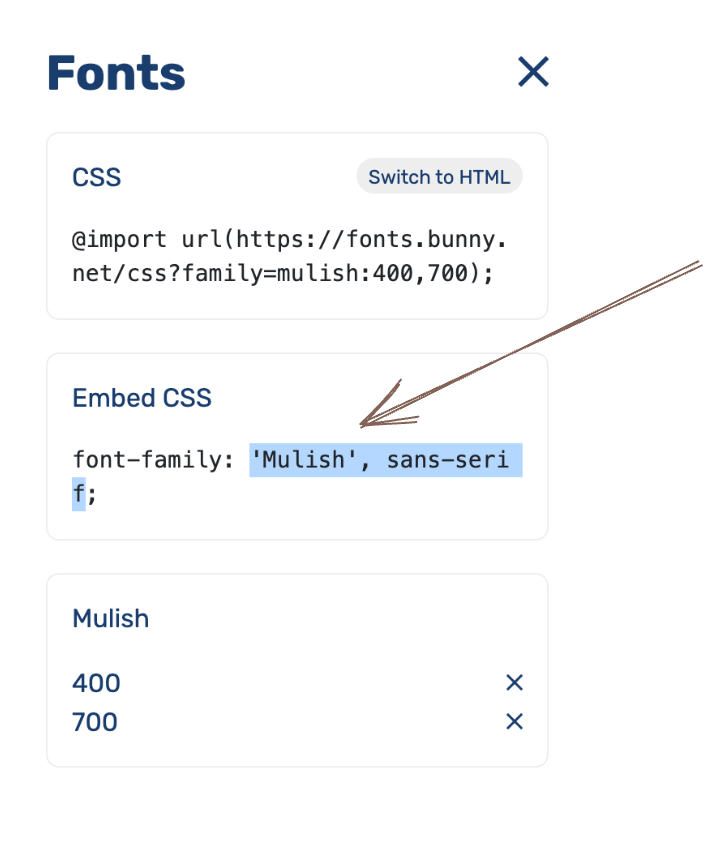
Copy the font family value from the Embed CSS section of Bunny Fonts.
Paste it in the relevant option in config.yaml in your theme.
If your theme does not support font customization, you can use CSS to change the font as explained in the next section.
2. Custom Fonts
If you need to add a custom font not available in Bunny Fonts, follow these steps:
- Upload the font files to Theme → assets
- Add custom CSS to a SCSS file in Theme → styles
Your custom CSS should look like this:
@font-face {
	font-family: 'My Font';
	src: url('/assets/my-font.woff2') format('woff2');
	font-weight: normal;
	font-style: normal;
}
body {
	font-family: 'My Font', sans-serif;
}