Writing (Basics)
Let’s learn how to use the Hyvor Blogs Editor and publish your first post!.
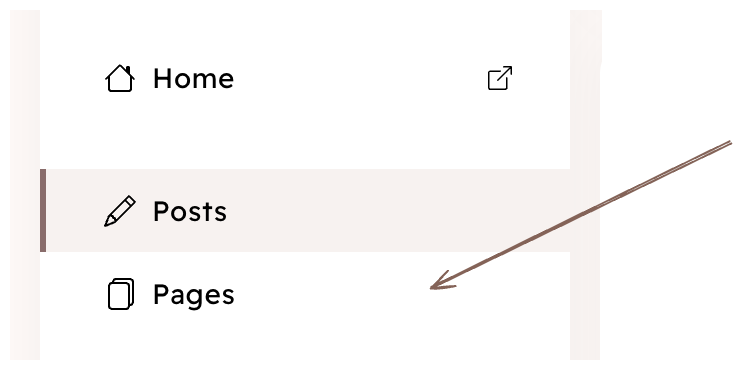
Posts & Pages
Hyvor Blogs supports two types of content: posts and pages. In most cases, you will be using posts. Pages are used for static content like About, Contact, etc.
Posts:
- are the main part of your blog, where you share your ideas, thoughts, and stories.
- appear in the index page or other collection pages
- can be created, edited, and deleted at Console → Posts
- have authors and tags
Pages:
- contain static information
- do not appear in the index page.
- usually is linked to in header or footer navigations.
- can create, edit, and delete pages at Console → Pages
- do not have authors or tags
Both:
- are uniquely identified by the slug
- by default have
/{slug}permalink. See this if you want to change post/page permalinks, for example to include year and month in the URL.
Post Metadata
Click the Settings button in the editor to open the post settings.
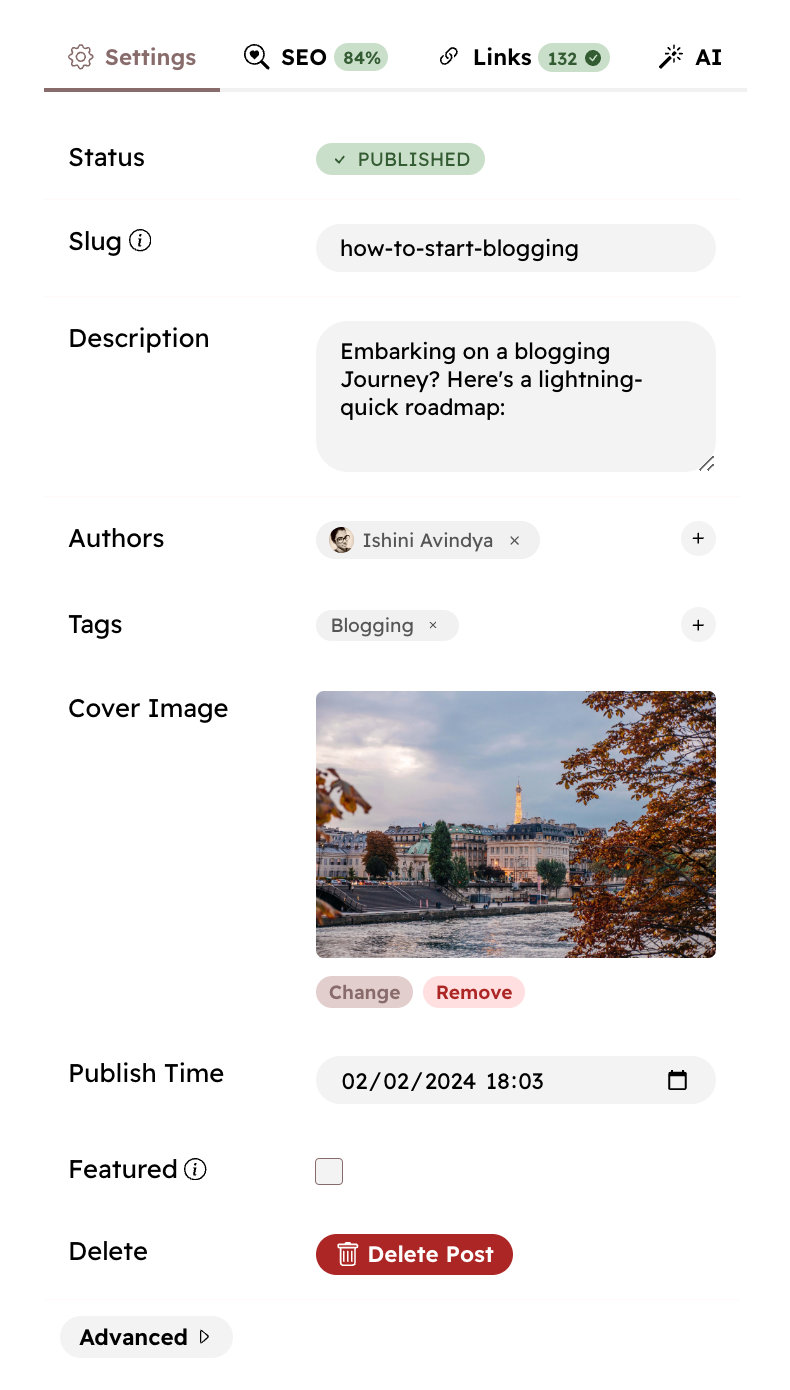
You can configure the following settings for a post:
- Slug - A unique URL-friendly identifier for the post. If you don’t set a slug, Hyvor Blogs will automatically generate one based on the post title when publishing the post.
- Publish Time - The publish time will be added automatically when publishing the post. However, you can set a custom publish time for a post.
- Authors - You can add users in your blog as authors of a post. By default, the post creator is added as an author of a post. Users with editor-level permissions can add or remove authors of a post. One post can have multiple authors.
- Tags - You can assign one or more tags to a post.
- Description - A short description of the post. This will be used as the meta description of the post for search engines and social media.
- Featured Image - The featured image of the post. This will be used as the meta image of the post for search engines and social media.
In advanced settings, you can add the following:
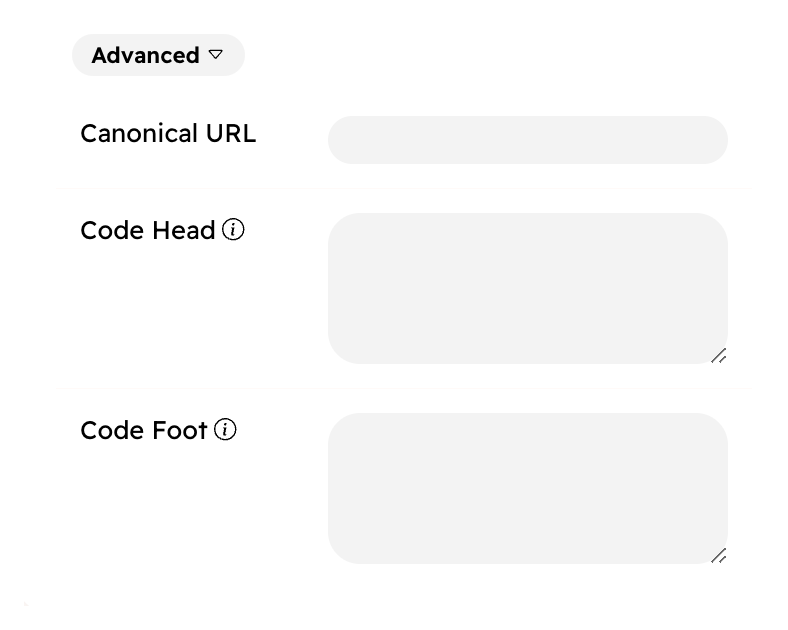
- Canonical URL - If you have published the same post on a different location, you can add the canonical URL of the post here.
- Code Head - Custom code to add right before the
</head>tag of the post. - Code Foot - Custom code to add right before the
</body>tag of the post.
See custom code documentation for more information on different ways of adding custom code to your blog.
Post Status
A post can have one of the following statuses:
- Draft - Not visible to the public. Only users of your blog can see the post in the Console.
- Scheduled - Not visible to the public. It will be published automatically at the specified time.
- Published - Visible to the public.
Publishing
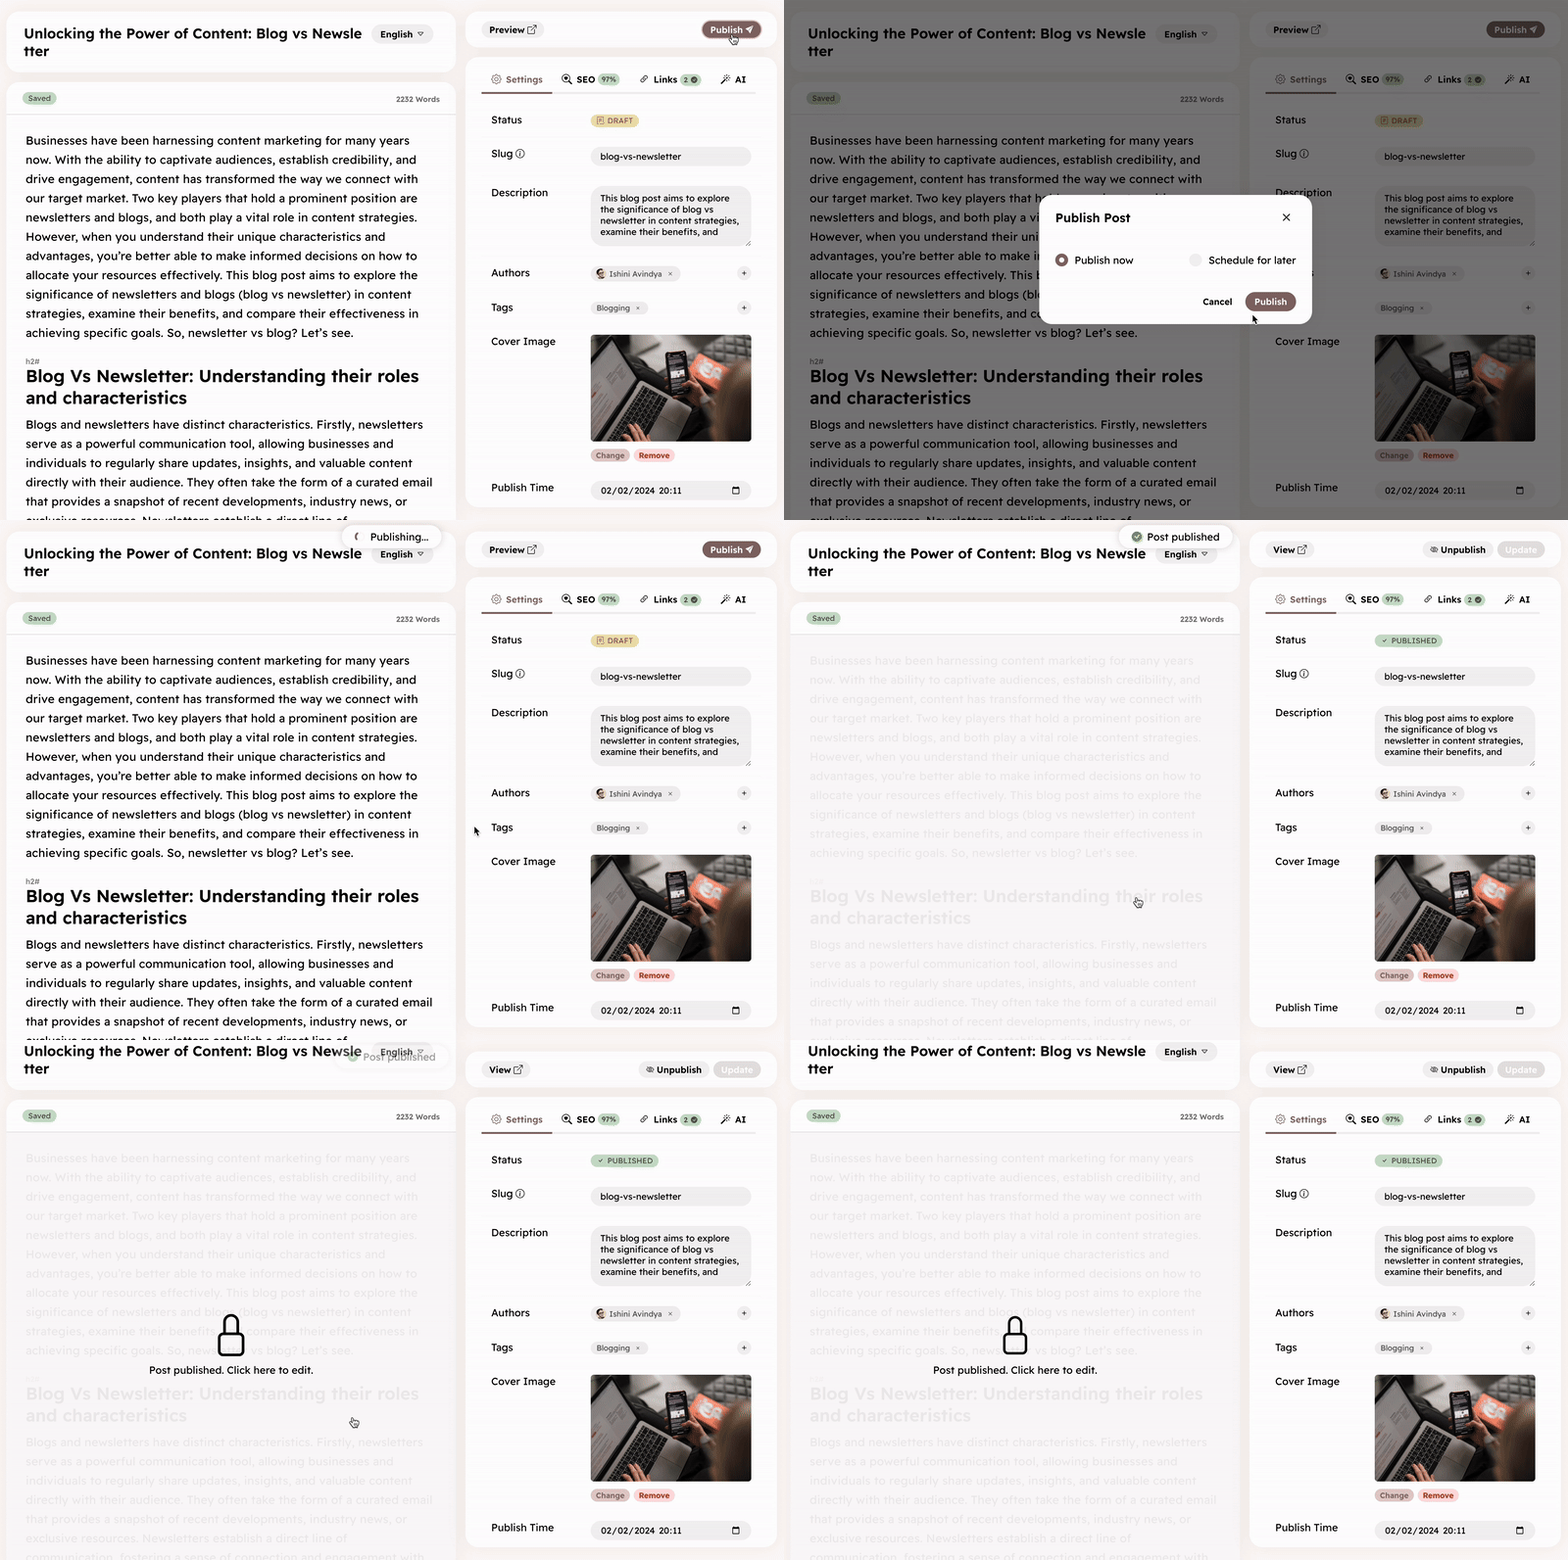
Once you have finished writing your post, you can publish it. Once published, the post will appear publicly on your blog.
Post → Publish
Scheduling
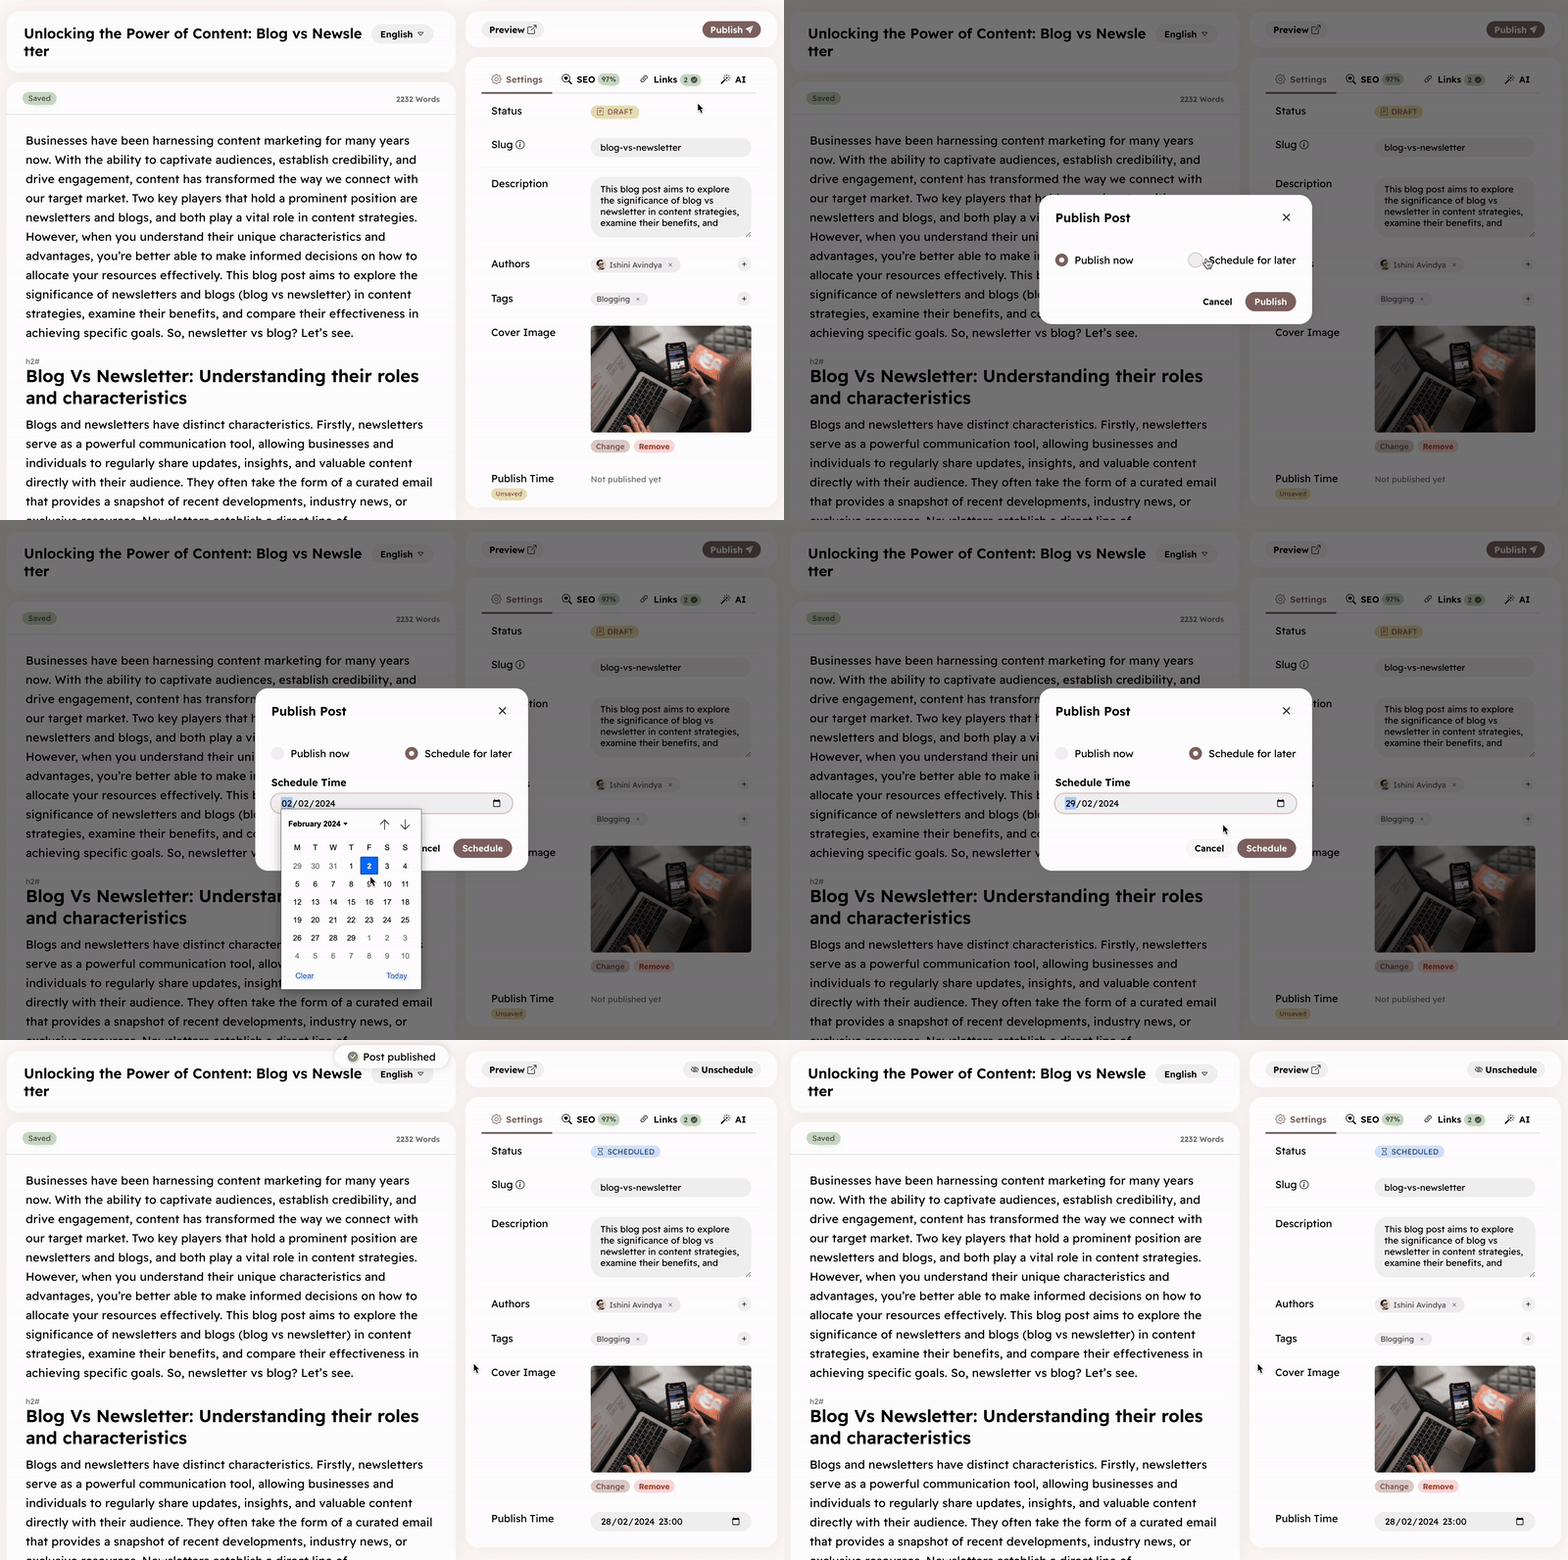
You can also schedule the post at a specific date and time. Hyvor Blogs will automatically publish your post at the specified time.
Post → Publish → Publish Later → Schedule
Unpublishing
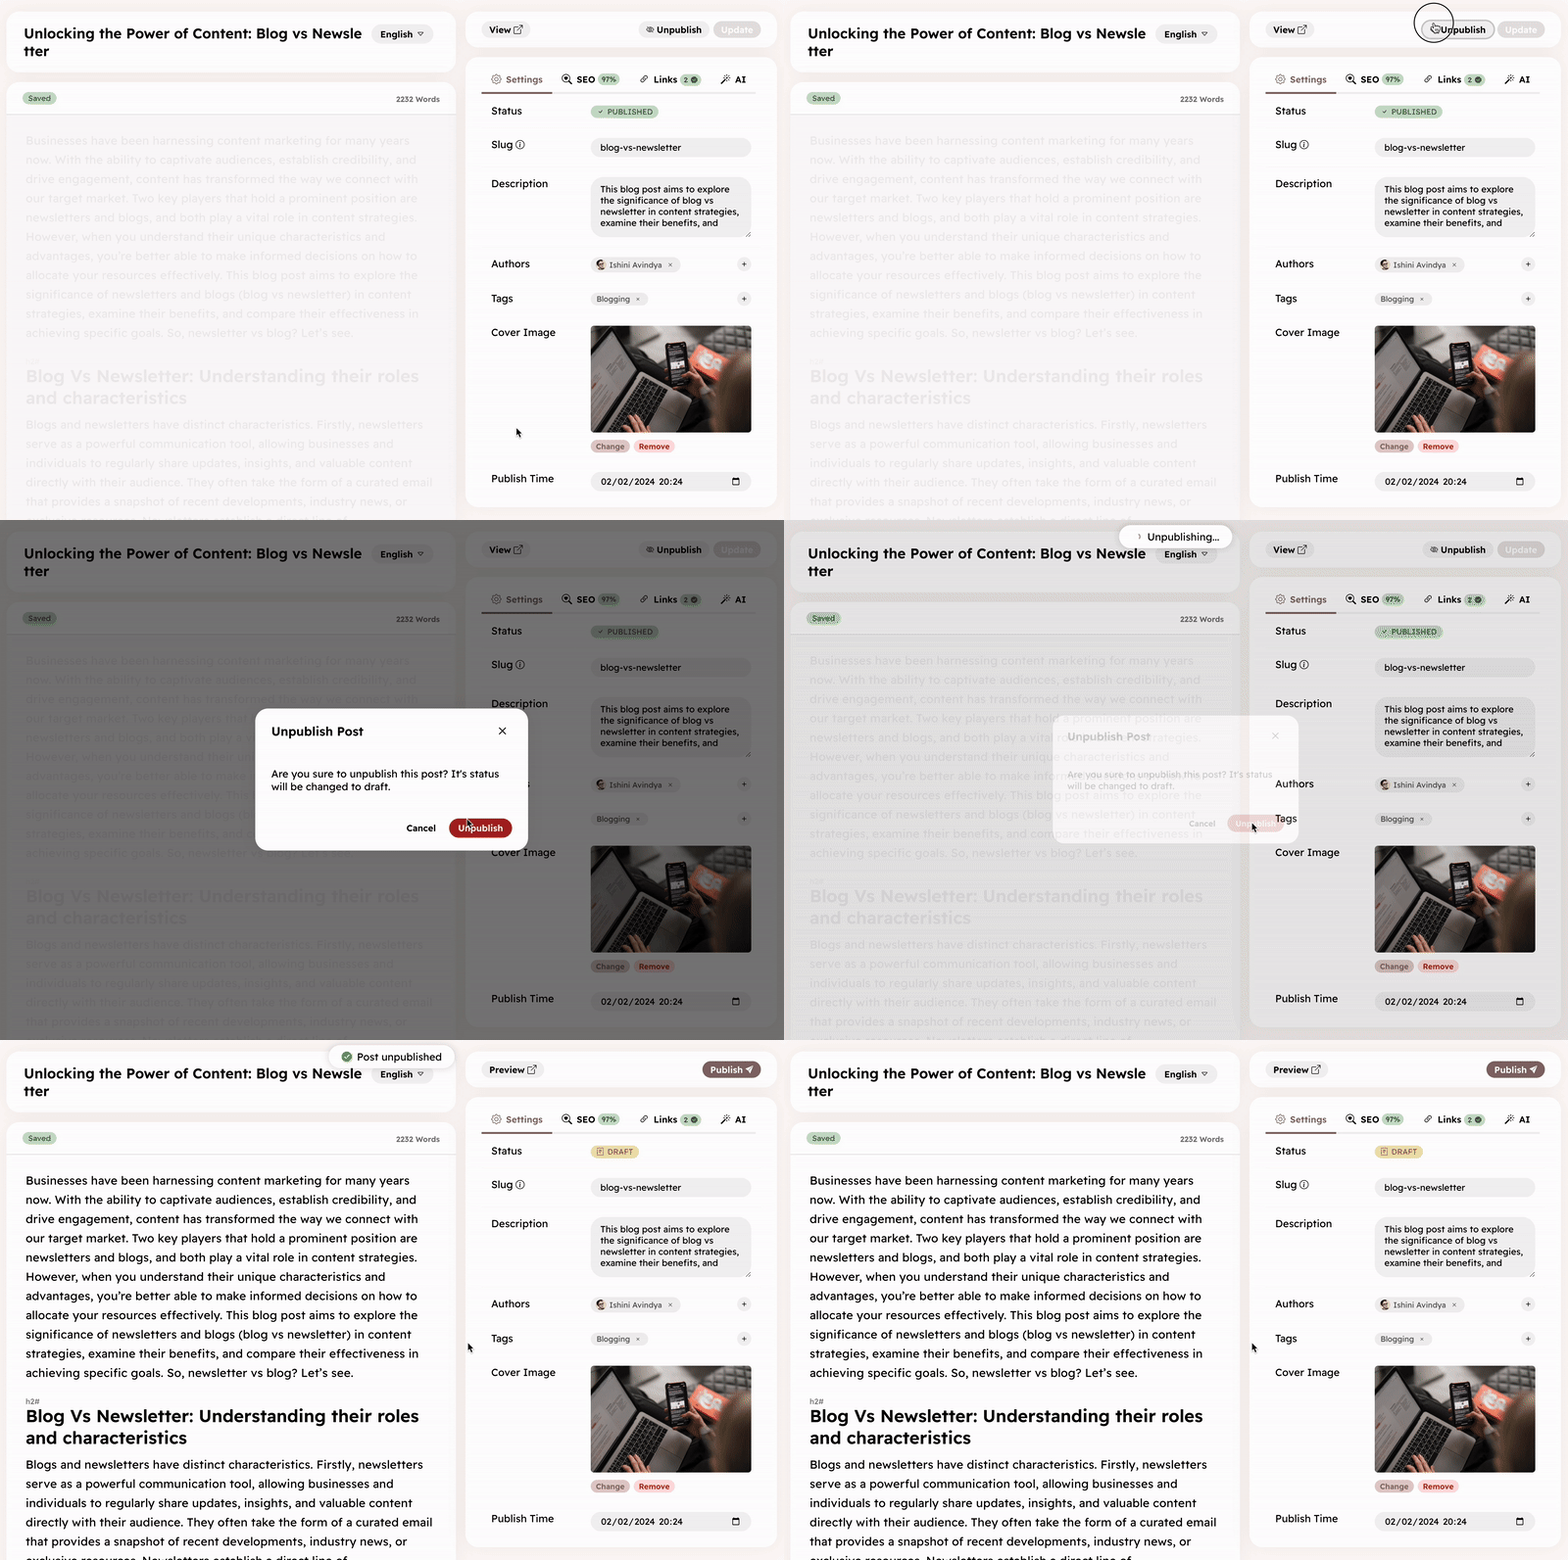
You can unpublish a published post. The post’s status will be change to Draft. Therefore, it will no longer appear on the blog. You can re-publish it later.
Post → Unpublish
Deleting
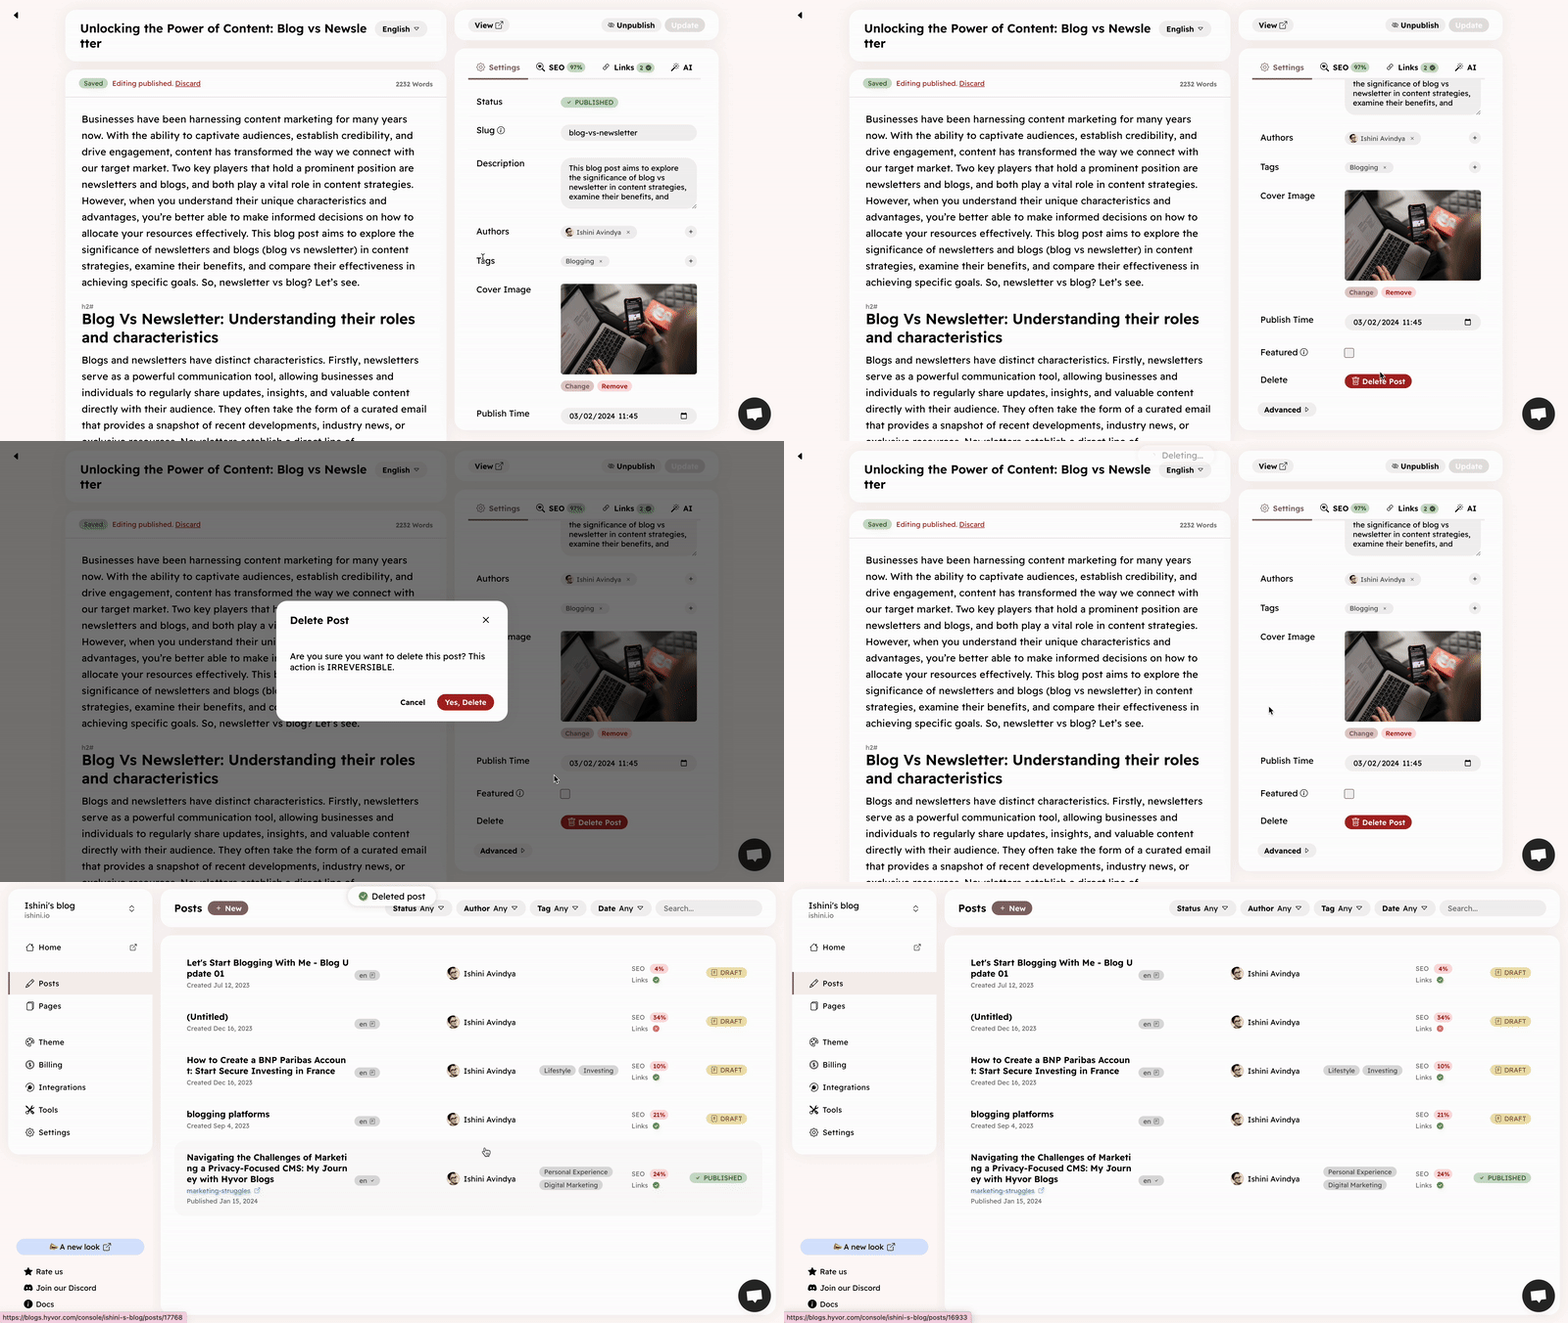
You can also permanently delete a post. Note that there is no way to restore a post after deleting. Consider Unpublishing if just want to hide the post from your blog.
Post → Settings → Delete Post
Other Guides
Auto-saving & Post History
If you are editing a draft, Hyvor Blogs will automatically save your post every 15 seconds if any post data (content or metadata) has been edited. You can also manually save your post by pressing Ctrl + S. Check the bottom right corner of the editor to see the status of the auto-saving.

If the content is edited, a post history will be created. You can refer back to this history if you want to revert to a previous version of your post. A single post can have up to 25 post histories.
Editing a published post
You can make changes to a published post content at any time. However, the changes will not be visible to the public until you publish the changes.
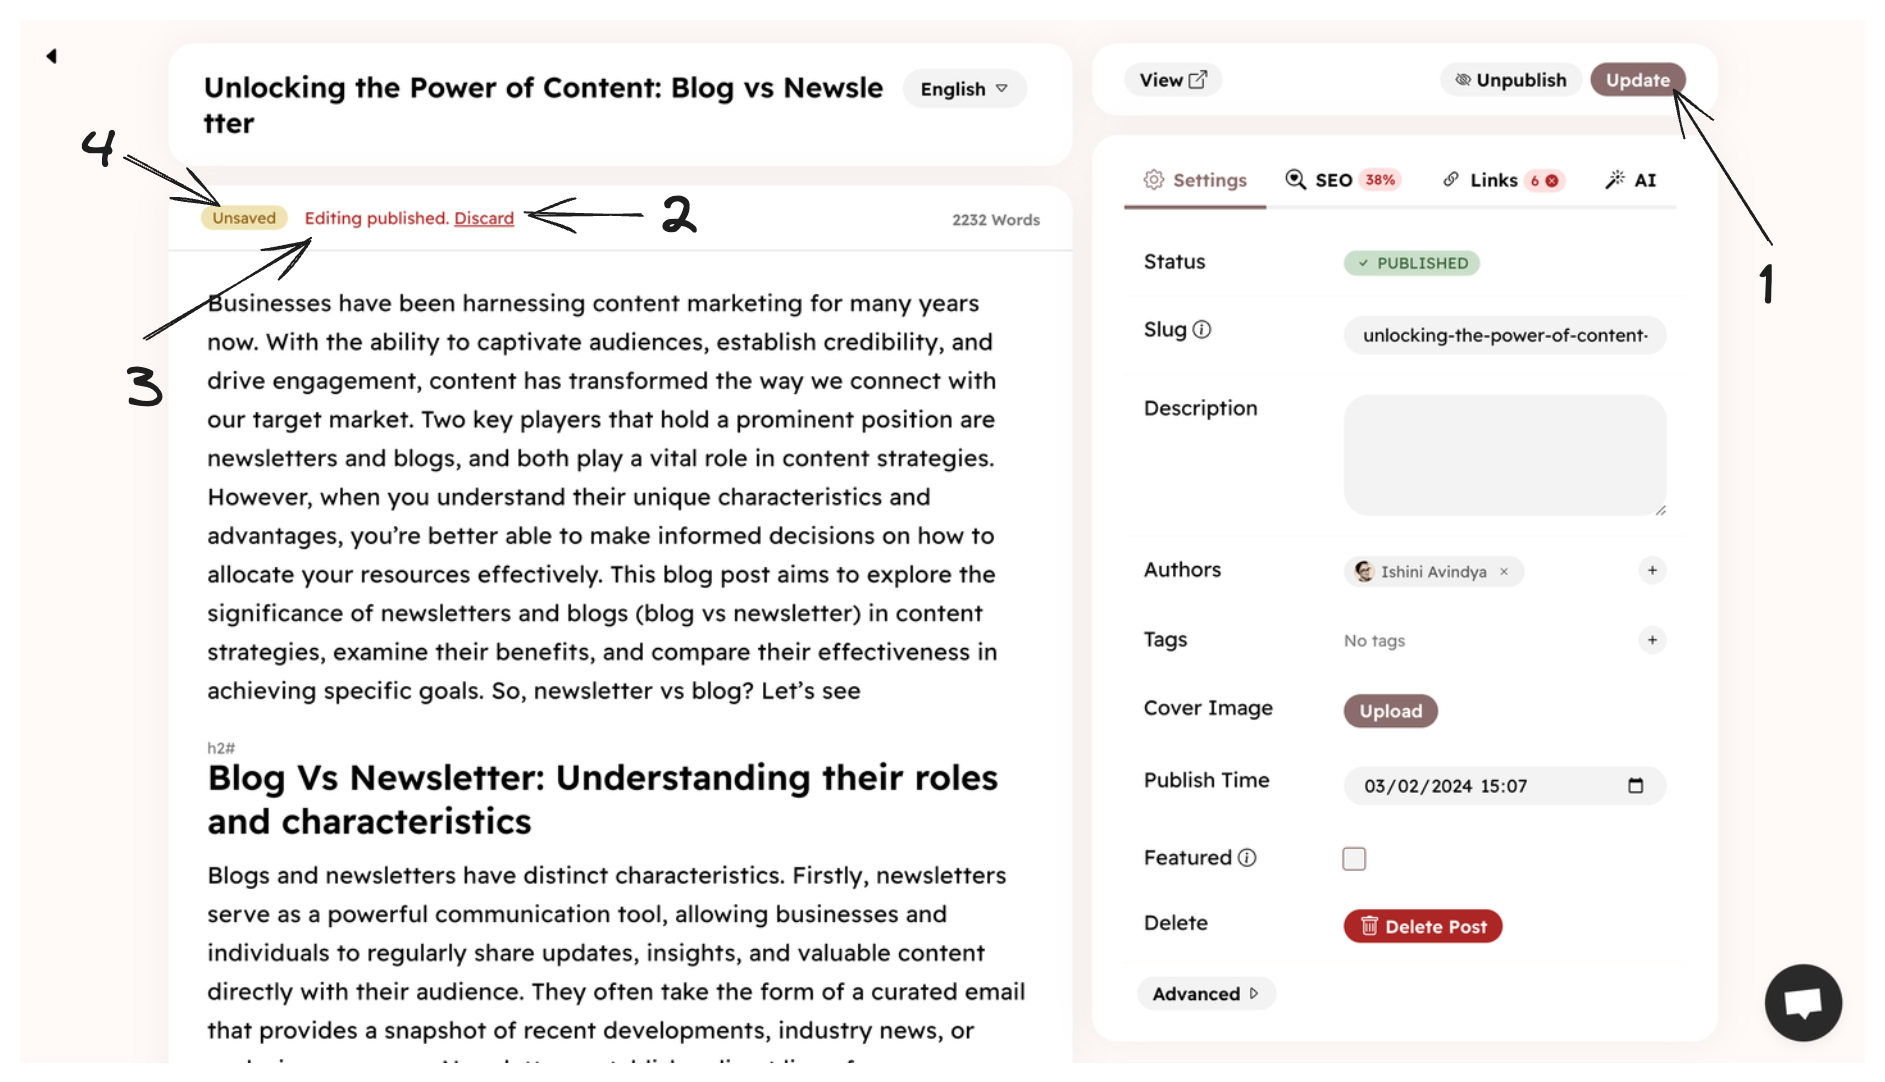
- Update - Publish the changes to the post. The post will be updated immediately.
- Discard - Discard the changes and revert to the published version of the post.
- Editing published - This message will be shown if you are editing a published post.
- This message can be one of these:
- Unsaved - The changes you have made to the post are not saved yet. Press Ctrl + S to save the changes. Or, it will be saved automatically in 15 seconds.
- Saved - All changes are saved
Note that metadata changes will be saved immediately and will be visible to the public.
Multi-language posts
If you have set up multiple languages for your blog, you will see the language codes at the top of the post editor. Click on a language code to switch to that language variant of the post. Each variant should be published separately. See our languages guide, which explains everything you need to know about publishing multi-language posts.
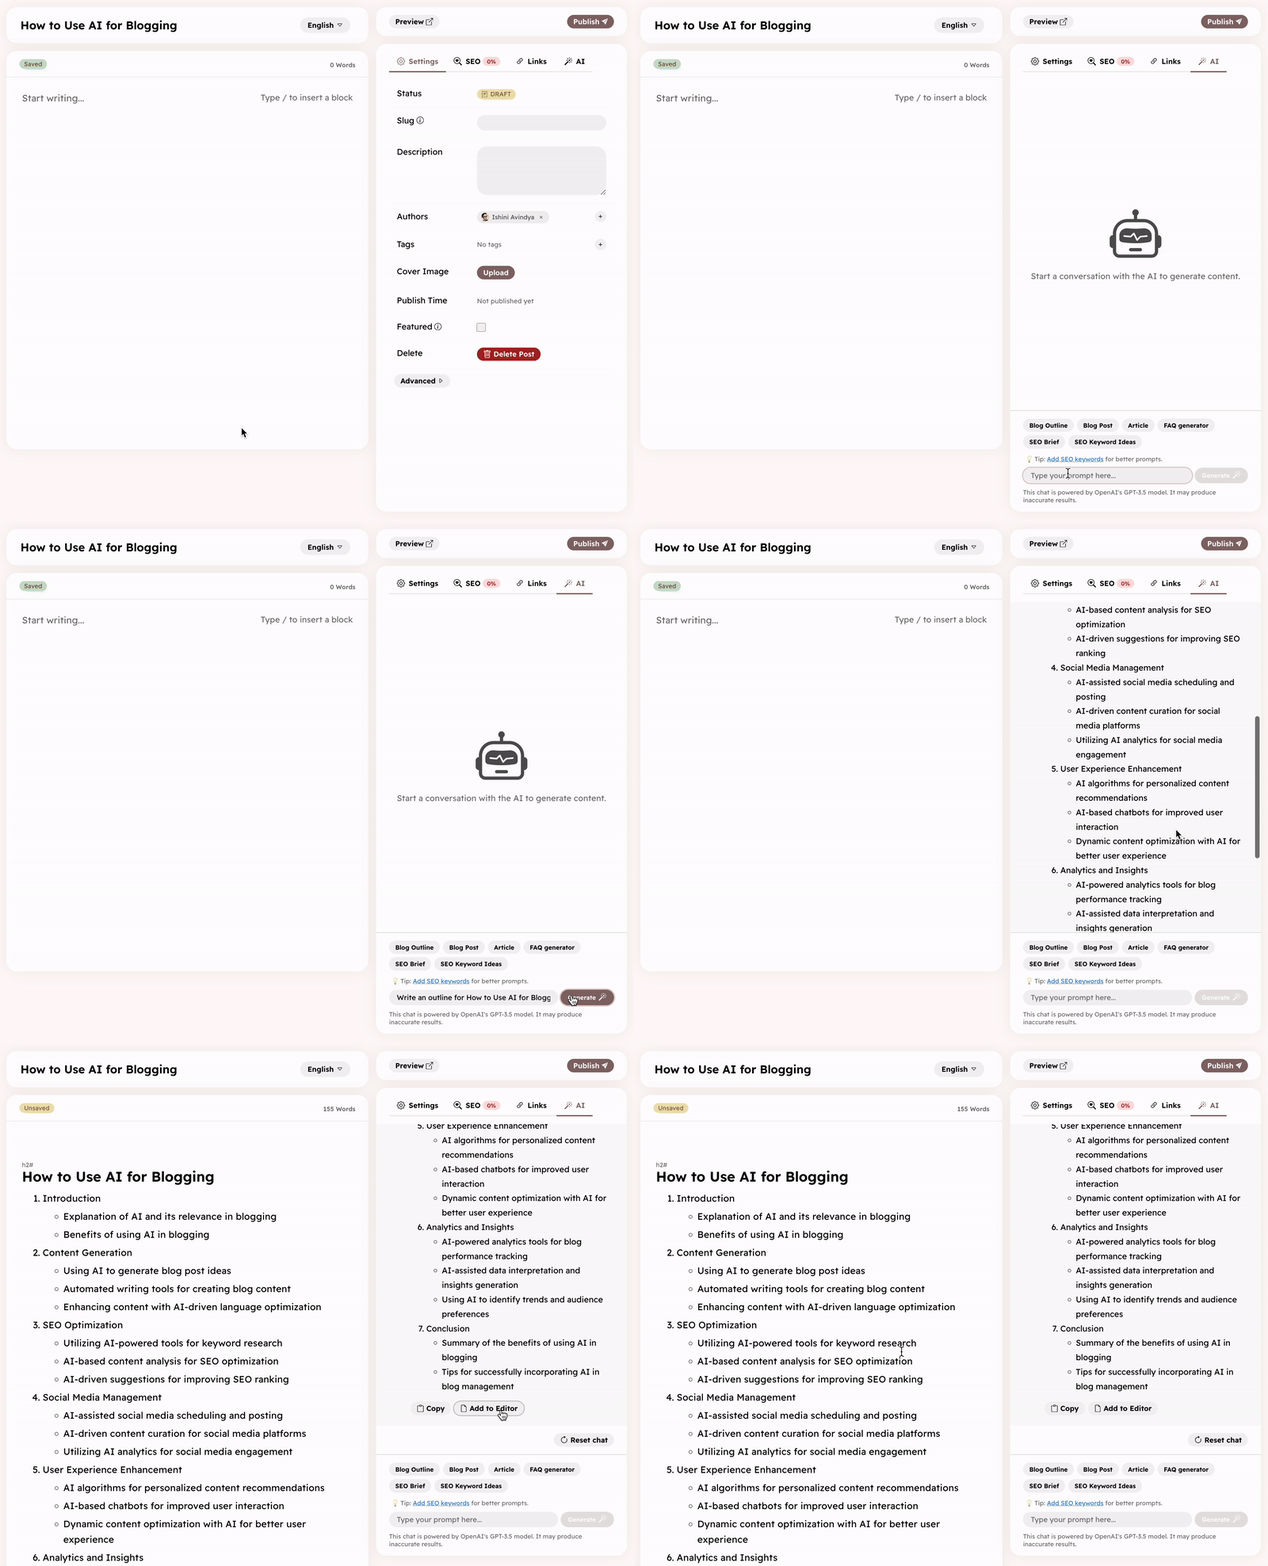
GPT Writing
We have integrated GPT 3.5 directly into the editor to help you with AI content generation tasks such as
- Generating a blog outline
- Writing a blog post
- Writing an article
- and more…
You can use the default prompts in most cases. However, you can also customize the prompts to get better results.